

Managing 3D models across the language versions of your online store doesn't have to be slow or repetitive. That's why the AR Viewer add-on offers a practical 3D model import and export feature that lets you move 3D models between your stores quickly and safely.
This feature is ideal for merchants running multiple online stores with the same product portfolio who want product presentation to stay consistent across every version of the store. In a few clicks you move not only the 3D models themselves, but also their complete settings, and the system automatically assigns them to identical products in the target store's database.
The result is a big time saving, no errors from manual setup, and a consistent AR experience for customers no matter which language version of the store they use. This guide walks you through the whole migration step by step – from exporting the data to deploying it successfully in the target store.
How to migrate models and settings
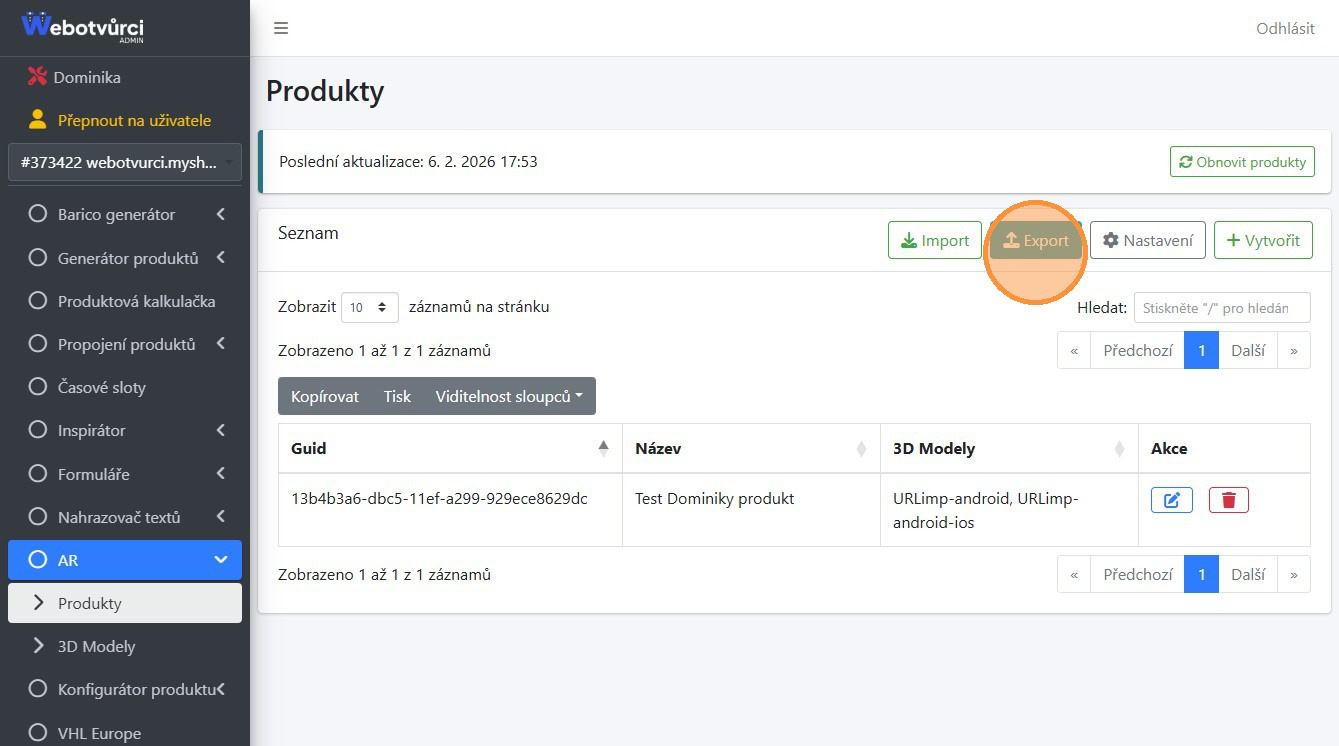
In the source store, first use the Export button to download the JSON to your computer.
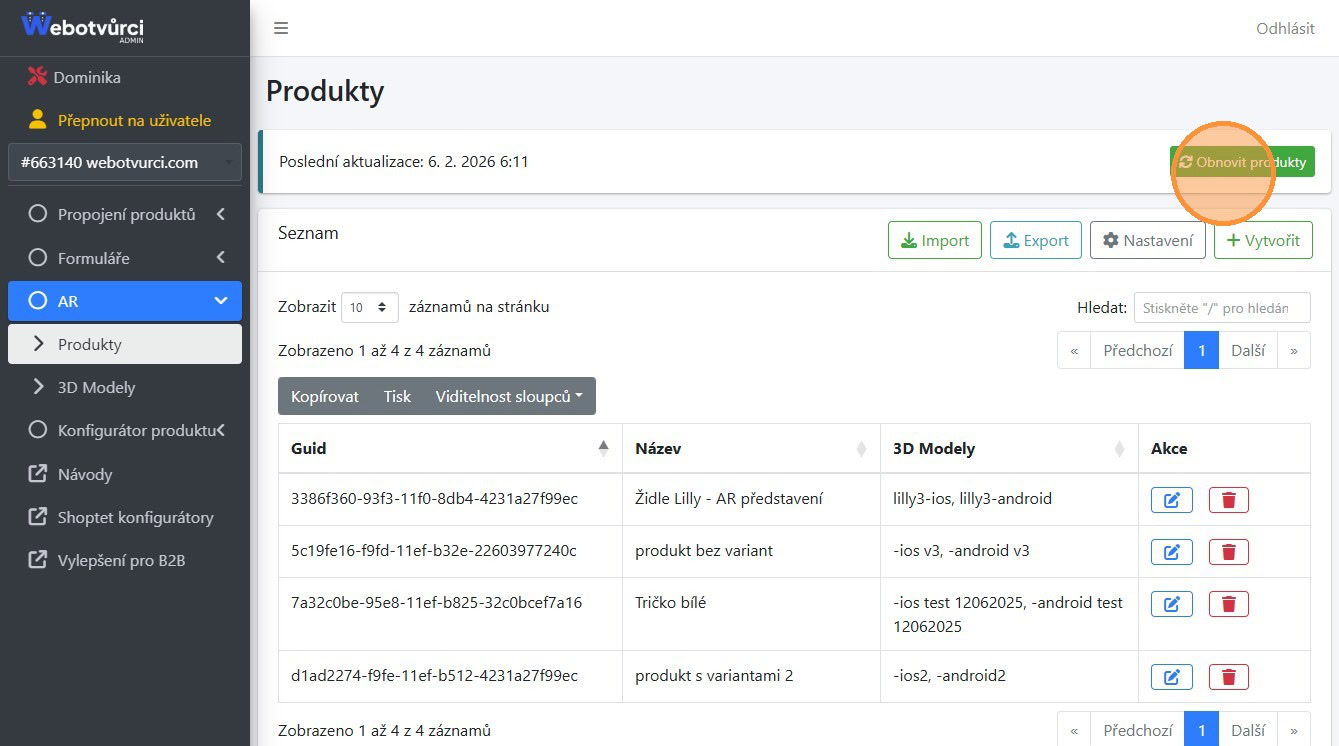
Then go to the add-on admin for the target store and click the Refresh products button in the Products section.
Once the database sync is finished, click the Import button.

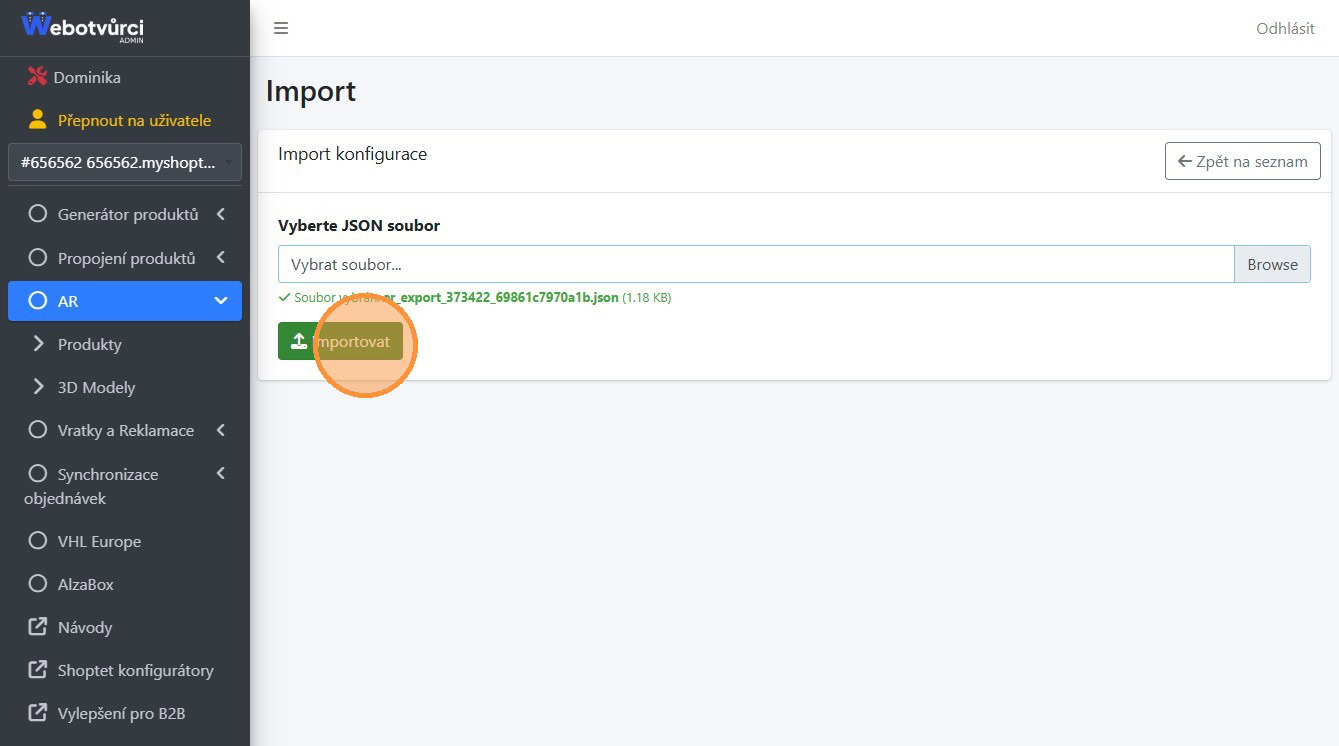
In the next window, click Browse and select the file you saved to your computer from the source store.
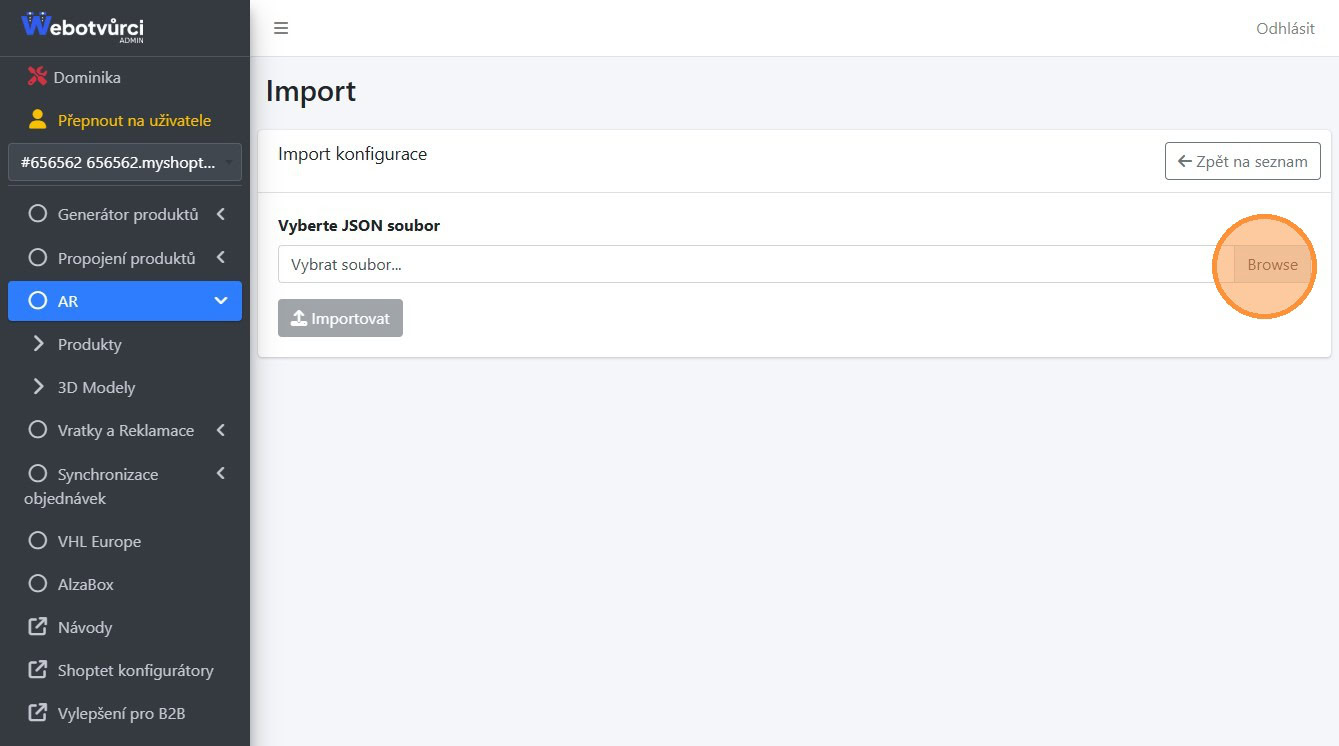
Then click the Import button.
If the migration succeeds, the models are not only uploaded but also assigned to products right away, following the pattern from the source store.
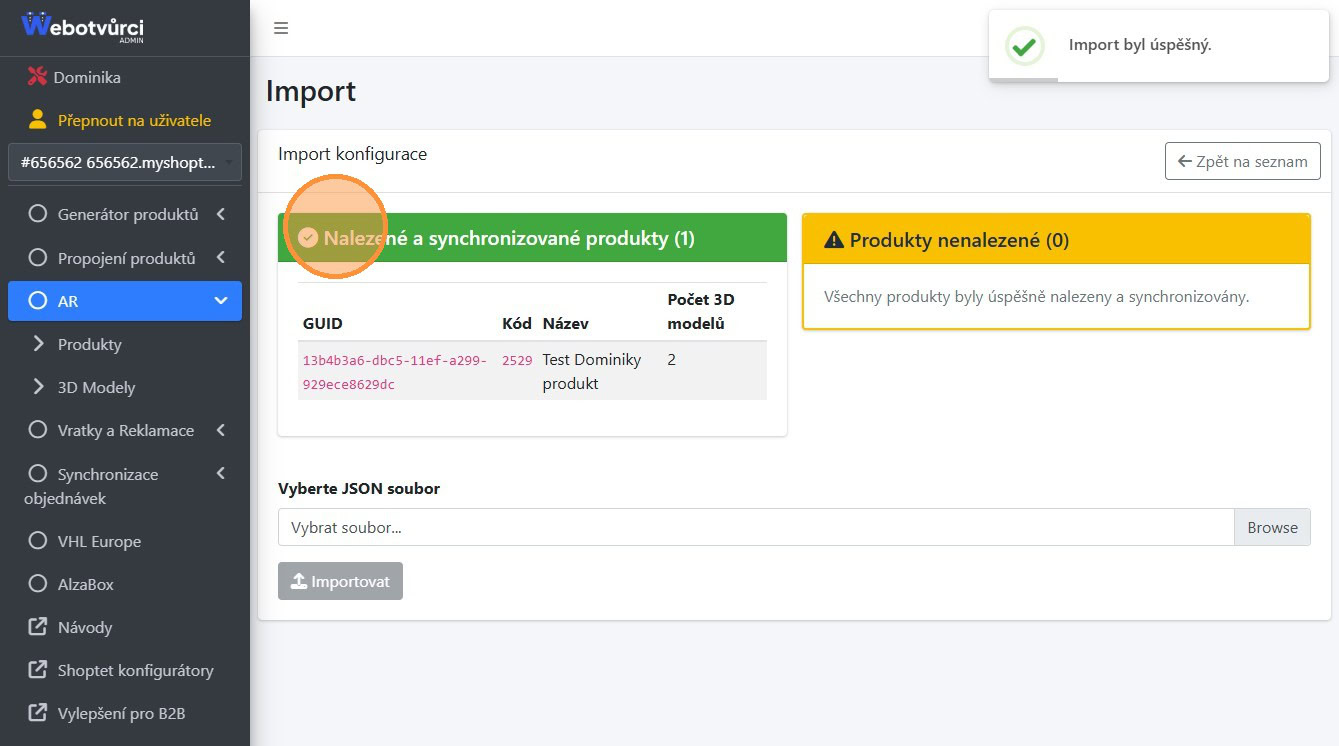
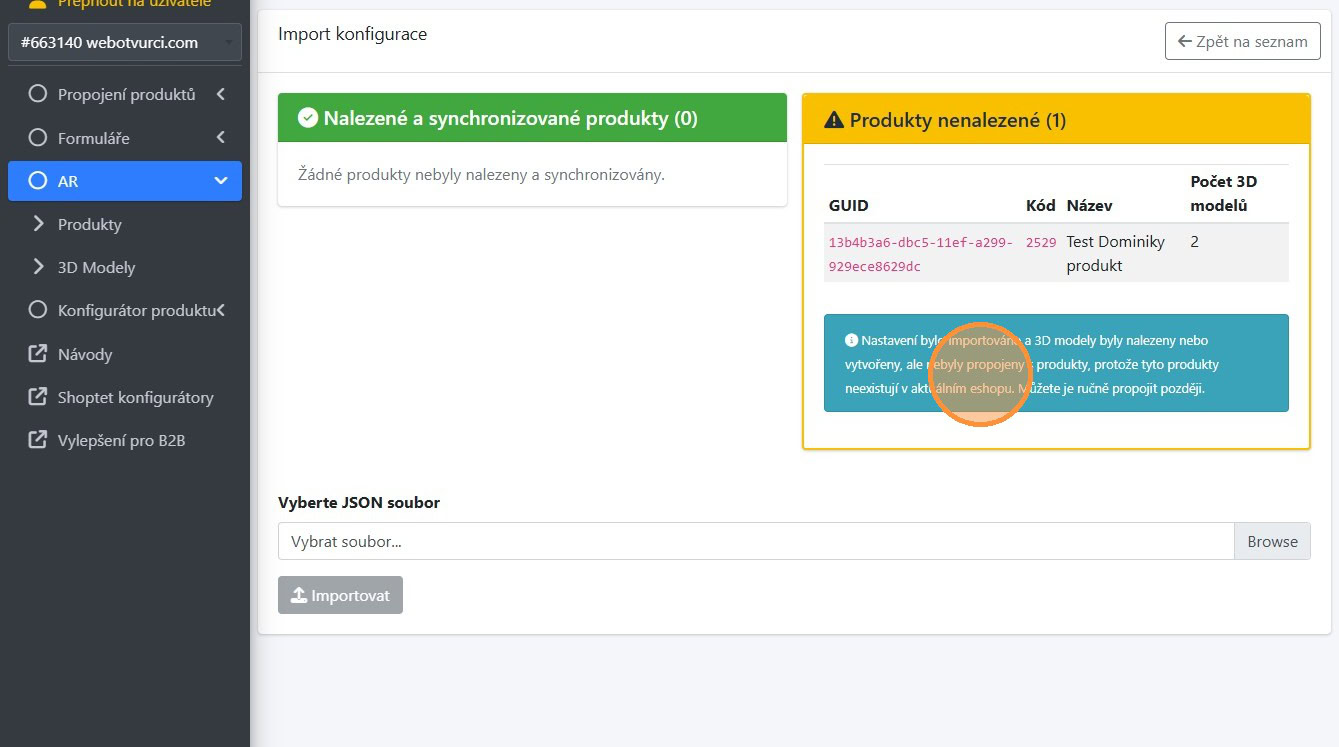
If the migration fails, the models are uploaded but assigned only to the products that were found. Any products that were not found are listed in the report. Once you add the missing products, you can run the import again and the models will be attached to them.